Migrating a VirtualBoxer


Or how I migrated some Virtualbox machines to KVM/QEMU
In the olden days, I would often set up a server on Virtualbox using a desktop install of my favorite Ubuntu flavor to get it up and running with a GUI interface since they typically worked good out of the box.
After it was stood up, I would disable the desktop portion and leave the rest running, then migrate it to a beefier server and set it up to run autostart and headless if everything was hunky-dory.
While it has worked great overall, using Virtualbox as a virtual host is kind of janky and hasn't offered the level of virtual machine support I've come to find useful from other hypervisors like KVM or containers like Docker.
I'm not ragging on it, I just have found these other tools to be a bit more effective when managing larger groups of virtual machines from a server perspective, but using Virtualbox has been handy for it's easy to use GUI interface and fairly robust hardware integration. It just works when I need it to, and there's tons of community support for it.
What I mean by this is when I am doing tests with larger fleets of VM's, QEMU and Docker are much easier to deploy and manage these groups using CLI commands to initialize and/or manipulate them.
In either event I've come across times where I have wanted to migrate from Virtualbox to KVM, or even from a bare-metal to virtualbox to my proxmoxbox server, so here's a couple stories on how I did that:
Scenario 1: moving an Ubuntu bare metal to Virtualbox to KVM
This project was to move my old small ERP server from the Dell it was on into a VM. This is surprisingly easy and worked like a champ! It was running Ubuntu 12.04 with software Raid 1, using minimal resources (read Athlon X2 and 2GB DDR2 RAM) and is just for internal company stuffs for my old company.
1) I cloned an image of both RAID disks (but really only needed the first one) and output them to .dd files, then changed permissions to my user on those images so Virtualbox could use attach to them.
2) using vboxmanage internalcommands I created a rawfile link to the first disk image, and attached it to a Linux-type VirtualBox with 4096MB ram and 3 cores of CPU. It booted up right away.
3) I adjust the network interface as those values change when you change hardware, so I modified devices in /etc/network/interfaces from eth0 to enp9s0 and switched static IP's to something on the local network, then restarted network services which brought it back online.
At this point everything was working well enough that I was ready to migrate it to KVM on the Proxmoxboxrox. So the process of importing a *.dd image to KVM is trivial as it does not need conversion of any type, and although *.dd doesn't support snapshots, I can either convert it later to another FS type or just rsync whole .dd snapshots to my backup box. I'll figure that part out later!
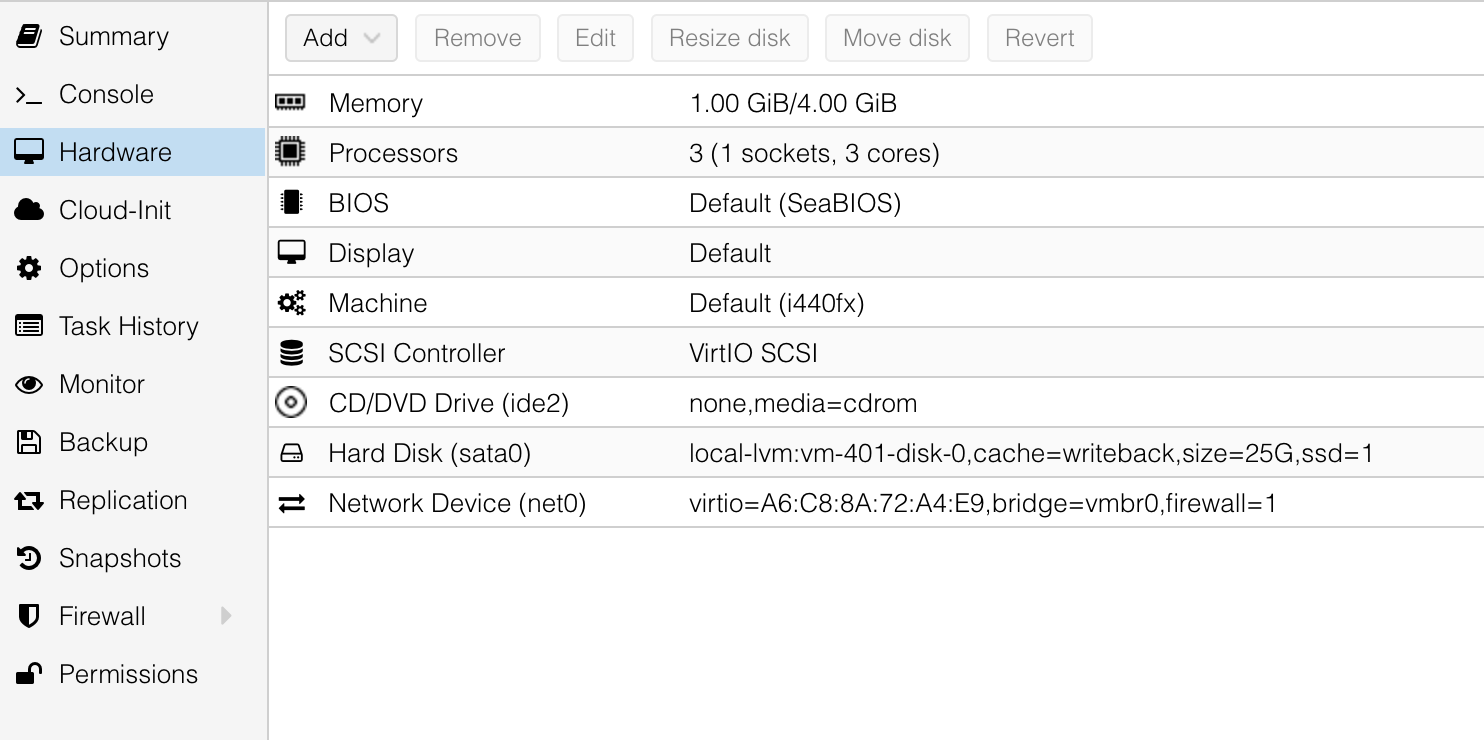
4) next I created a VM instance on Proxmox with the necessary resources. In this instance I gave it 1024MB RAM (balloons to 4096MB), 3 cores, and attached to vmbr0 interface. It doesn't let me create an instance without a disk, but I can just remove that later.
At this point it was ready to finish, but I did not boot the instance yet, as I wanted to first connect the transferred disk image first, then let it fly.
The process to attach an existing disk to a VM in Proxmox is pretty easy. After doing some Google-fu, it looks like the disk must be declared on that instance's conf file in /etc/pve/qemu-server/ first as an unused device, then attached to the instance via GUI and configured. I followed this guide which helped the initial set up, and then the comment by Sergio which described the "qm rescan" bit to help the system identify the changes.
5) Fire it up and work out the bugs. So here we go! First bug: no boot disk found! Aw crap what happened? Let's check settings:
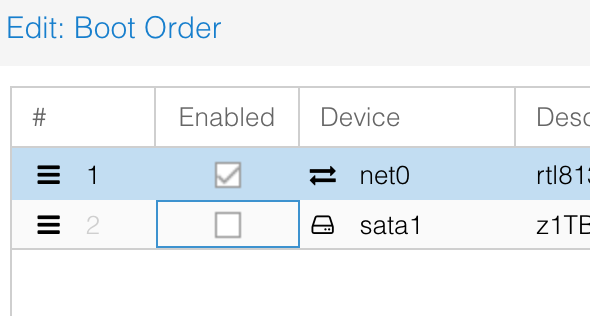
Ah. Newly attached disk does not get set as a boot option. Enable that, disable the others. Try again.
Boom! Everything fired up without a hitch. So next step was just resetting the network interface again for the new host. Super easy.
Lastly on this particular instance, I went in and removed the 2nd RAID drive from mdadm so it wouldn't operate on degraded performance mode, and I don't really need the redundancy as the system is no longer mission critical and only for reference now, and I can just perform regular snapshots for backup protection. After that, do a --grow operation (huh huh) which is used to shrink the number of RAID devices, interestingly enough. Neat.
Scenario 2: Migrate from Virtualbox to KVM
The second project I did recently was to move a small Wordpress website I was hosting on Virtualbox from that server to the Proxmoxboxroxsox for better underlying hardware. The process was very similar however there are couple differences in steps as this VM had a long timeline of snapshots which needed to be merged to produce a current image, which I learned the hard way!

My first try I took a similar approach as the baremetal, yanking the VMDK image from Virtualbox and connecting it to KVM as before. It worked well enough, however I noticed the Wordpress site was ... old. It was using the old site design and after further inspection it was clear that I was using an old snapshot image. Oh, right, snapshots. I didn't merge the snapshots. Fascinating!
So restarting the process,
1) exported the VM with vboxmanage which merges the diffs from the snapshots, then produces the OVA in a tidy package. From there I sent it to the Proxmoxbox. Now back to the Google Fu to reveal how to import an OVA to KVM.
2) .. unzip the OVA! It turns out the OVA is an archive which contains the Virtual disk and a couple of other files like manifest and what not. The only part I needed to grab was the VMDK, easy enough. But KVM cannot read VMDK natively it seems.
3) use qemu-img convert to produce a readable image, in this case I used qcow format as it has native KVM support and has snapshot capabilities and file-space balloon support, though the abstraction layers versus raw can leave some performance on the table. It's not a high volume server and it is running on SSD so I'm not too worried about it.
4) create the VM instance again, set parameters but not invoke it.
5) as before, attach the unused disk and perform the "qm rescan" so it's detected, then set it's parameters including enabling the disk for booting in the options. Looks ready to fire up.
6) send it! Started up without a hitch this time, and after reconfiguring the network interface in /etc/network/interfaces to enp-whatever-it-was, it was connected to vmbrsomething and reached the outside world. Presto.
Finishing touches
For both servers I created a reverse proxy tunnel for SSL support using NPM and CloudFlare Full Strict as my Cert Authority. This setup works fantastic for these small servers and CloudFlare offers a modest performance boost with the CDN and caching capabilities when used with Full-strict SSL and edge certs.
